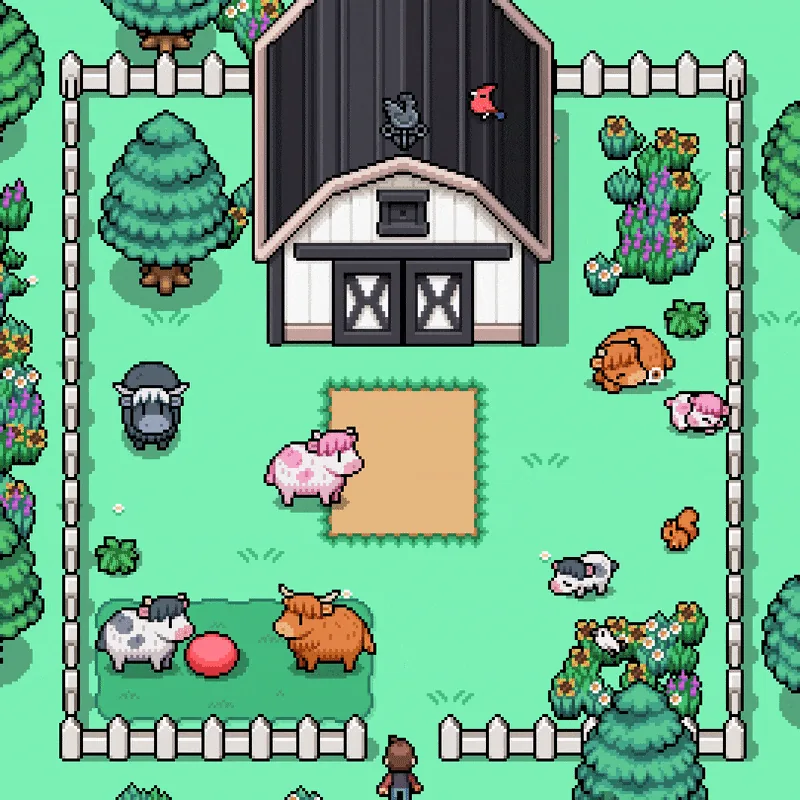
Fields of Mistria has eight main ranch animal species in the current 1.0 game: Chickens, Ducks, Rabbits, Capybaras, Cows, Horses, Sheep, and Alpacas. Small animals live in Coops and large animals live in Barns. Raising them is not only an income system: affection unlocks better products, breeding lets you climb through rare color tiers, and the ranching loop eventually connects to automation, the Animal Festival, cosmetics, and collection goals.
This guide focuses on the practical questions players actually run into: which building an animal needs, how breeding works, why a pairing failed, how long babies take, how to reach seasonal colors, and what changed by the 1.0 release.
For seasonal planning, keep the Fields of Mistria Calendar nearby. If you are deciding how ranching fits beside farming, see the Fields of Mistria Crops Guide. Completion-focused players should also coordinate ranch products with the Recipes Guide and Museum Guide.
All Fields of Mistria animals
The current ranch roster is split evenly between Coops and Barns.
| Housing | Animal | Baby maturity | Typical product role |
|---|---|---|---|
| Coop | Chicken | 3 days | Eggs or rooster feathers |
| Coop | Duck | 3 days | Duck eggs or feathers |
| Coop | Rabbit | 3 days | Rabbit wool |
| Coop | Capybara | 3 days | Bristles |
| Barn | Cow | 5 days | Milk or bull horns |
| Barn | Horse | 5 days | Horse hair |
| Barn | Sheep | 5 days | Sheep wool |
| Barn | Alpaca | 5 days | Alpaca wool |
Animals adopted from Hayden's Shop begin as babies. Coop animals mature after three days, while Barn animals take five days. That distinction matters if you are building a breeding program because a baby cannot immediately become a parent.
The daily animal-care loop
A good ranching routine is simple: feed the animal, pet it, collect any available product, and decide whether the weather is suitable for outdoor time. Consistency matters because animal affection is used by several later systems.
Hearts are not just cosmetic friendship markers. Prospective breeding animals need at least two hearts, while high-affection animals gain access to golden versions of their normal products. Current 1.0 references place the animal heart cap at ten. At the top end, golden products become the important reward for maintaining a well-cared-for herd or flock.
Do not confuse feed quality with animal color. A rare-color animal does not automatically produce a different product type or faster production cycle. Color breeding is primarily a collection and customization system; affection and care are what matter for the product progression.
How to breed animals
Breeding is one of the most distinctive parts of Fields of Mistria ranching. Before buying treats, check every requirement:
- Use two mature animals of the same species.
- The pair must be male and female.
- Both parents need at least two hearts.
- Keep the parents in the same appropriate Barn or Coop.
- Leave an empty housing slot for the baby.
- Give both parents their species-appropriate Heart Shaped Treats.
- Check the Animal menu for the stork indicator confirming the breeding attempt.
Heart Shaped Treats are available through Hayden's Shop. Once a valid pair has been bred, the offspring is determined and the baby arrives four in-game days later. Chickens and Ducks hatch rather than giving live birth, but the four-day timing still applies to the current system.
If nothing happens after using a treat, check age, heart level, sex, species, building assignment, and available housing space before assuming the game is bugged.
Breeding rare colors and Tier 6 seasonal animals
The reason to repeat breeding is the color system. Animal appearances are organized into rarity tiers, eventually leading to the special seasonal Tier 6 variants.
A practical strategy is to keep the best-tier offspring from each generation and use those animals for the next round of breeding. This gradually moves the ranch away from the common adoption colors and toward rarer appearances. Because color does not change the fundamental product cycle, you can choose whether this collection grind is worth the Barn or Coop capacity it consumes.
Tier 6 is particularly useful as a long-term goal because it contains seasonal variants associated with Spring, Summer, Fall, and Winter. If you want a complete color collection, do not sell every higher-tier breeding animal as soon as a new baby appears. Keep a small breeding line and track which seasonal variants you still need.
The game does not need an invented percentage chart to make this system understandable. The reliable approach is to treat color tiers as progression milestones and verify the offspring you actually receive in the Animal menu.
Golden animal products
Affection also provides a reason to keep favorite animals instead of constantly replacing them. At high heart levels, animals can produce golden versions of their normal goods. Examples across the ranch include Golden Milk, Golden Eggs, Golden Duck Eggs, Golden Horse Hair, Golden Sheep Wool, Golden Alpaca Wool, Golden Bristles, and golden versions of male-animal products such as feathers or horns.
This creates two different ranching objectives:
- Color breeding rewards maintaining a carefully selected family line.
- Golden production rewards long-term care and affection.
You can pursue both at once, but they are not the same mechanic. A visually rare animal still needs care if you want strong affection-based production.
Animal products also overlap with cooking, gifting, requests, and broader completion. Before selling every Egg, Milk, Wool, or golden product, check whether you need it for a recipe or progression objective. The Recipes and Cooking Guide is the natural next stop if your ranch is becoming an ingredient source rather than only a money source.
Barn and Coop planning
Breeding consumes space quickly. One of the easiest mistakes is filling every slot with adults and then discovering there is nowhere for a baby to arrive. Keep at least one open slot in a building when you are actively breeding, and avoid starting several breeding projects unless your housing can support the resulting animals.
It also helps to separate production animals from breeding stock mentally. A high-heart animal may be valuable because of its products, while a newer animal may be valuable because its color tier advances your collection. Selling solely by appearance can accidentally remove the animal you needed for your next breeding step.
Ranching automation and the Auto-Feeder
Later progression can reduce repetitive ranch chores. The Fourth Major Update added an Auto-Feeder, purchasable from Hayden after reaching Ranching Level 45. It converts dishes, crops, and forageables placed inside into feed of equivalent quality and automatically refills troughs each morning.
That makes the Auto-Feeder most useful after your ranch has expanded beyond a handful of animals. Early on, manual feeding is manageable; later, automation frees time for Mines, Museum work, relationships, and the rest of the 1.0 endgame.
Earlier updates also introduced the Animal Sprite Statue as another care-oriented quality-of-life tool. These systems are best viewed as late-ranch conveniences rather than reasons to postpone buying your first Chicken or Cow.
If your farm is split between a large crop field and several animal buildings, automate both sides gradually. The Water Sprite Statue guide covers the crop-watering system players commonly search for as sprinklers.
Animal Festival
The Animal Festival is held on Winter 10. Ranchers should prepare one strong small-animal candidate and one strong large-animal candidate rather than remembering the event the night before. The Calendar Guide is useful for planning the final week of care around the festival.
If you care about both festival participation and breeding, avoid selling your best-affection animals merely to free space. Housing expansion is often less disruptive than rebuilding months of animal affection.
Pets, Friend-Shaped skins, and the Big Chicken mount
Farm livestock are only one part of the game's animal theme. Version 1.0 expanded the cosmetic side substantially. The official 1.0 notes state that the Combat perk Friend-Shaped allows monsters to drop Pet Skins that make your pet resemble those monsters. This builds on the pet-skin system introduced before full release.
Version 1.0 also finally added the Big Chicken mount, a creature NPC Studio had teased years earlier. It is separate from ordinary Chicken breeding: do not expect a normal Tier 6 Chicken breeding result to simply turn into the mount.
These additions are useful examples of why old Early Access animal guides can feel incomplete even when their basic breeding advice remains correct.
Ranching and Town progression
Ranching is not isolated from the rest of the save. Shipping animal products contributes to the same broader economy and Renown loop as crops, while Town Rank unlocks new systems elsewhere on the farm. If you are deciding whether to spend a season expanding Barns and Coops or pushing town upgrades, use the Town Rank and Renown Guide to see what the next milestone unlocks.
That progression eventually leads into systems such as Apiaries and Terrariums. They do not process ranch animals, but they compete for the same farm-management attention and benefit from the same strategy: keep useful duplicates, maintain seasonal storage, and avoid selling the first copy of something needed for completion.
Why won't my animals breed?
If breeding is failing, work through this checklist before spending more treats:
- Are both animals adults rather than babies?
- Are they the same species?
- Are they opposite sexes?
- Does each parent have at least two hearts?
- Are both assigned to the same Barn or Coop?
- Is there a free housing slot?
- Did you use the correct Heart Shaped Treats?
- Does the Animal menu show the stork indicator afterward?
The four-day baby timer starts from a successful breeding attempt. Waiting four days will not fix a pairing that never met the requirements in the first place.
Best ranching strategy for a new save
Do not try to collect every animal color immediately. Start with a manageable number of animals, establish a daily feed-and-pet routine, and learn how much time you actually want to spend ranching. Once your first animals mature and reach two hearts, begin one breeding line at a time.
As your farm becomes more profitable, expand housing and keep higher-tier offspring for future breeding. Meanwhile, maintain a few high-heart animals for golden products and festival preparation. By late game, Ranching perks and automation make a larger collection much easier to manage.
This staged approach is more efficient than filling every Barn and Coop with low-heart animals and then trying to solve space, affection, and breeding progression simultaneously.
Frequently asked questions
How many ranch animal species are in Fields of Mistria 1.0?
There are eight main ranch species in the current game: Chickens, Ducks, Rabbits, Capybaras, Cows, Horses, Sheep, and Alpacas.
How many hearts do animals need to breed?
Both mature parents need at least two hearts, along with the other breeding requirements such as matching species, opposite sexes, shared housing, free space, and the correct Heart Shaped Treats.
How long does animal breeding take?
A baby currently arrives four in-game days after a successful breeding attempt. Coop babies take three days to mature; Barn babies take five.
Do rare animal colors give better products?
Color rarity is primarily cosmetic and does not by itself change the animal's basic product type or production cycle. Affection is the important progression system for golden products.
Is the Big Chicken a normal breeding color?
No. The Big Chicken is a mount added in version 1.0 and should not be confused with ordinary Chicken color-tier breeding.
Related guides
- Fields of Mistria Calendar — festival and seasonal planning.
- Fields of Mistria Crops — plan the farming side of your daily routine.
- Recipes and Cooking — use farm and ranch ingredients efficiently.
- Sprinklers / Water Sprite Statues — reduce crop-side chores while your ranch grows.
- Museum Guide — coordinate first-copy donations and completion goals.
- Town Rank and Renown — see how farm activity fits broader progression.
- Apiary and Honey — another farm production system unlocked later.
- Terrarium Guide — convert duplicate insects into collection tools.
- Fields of Mistria 1.0 Guide — full-release systems and returning-player checklist.
- Fields of Mistria Achievements — completion planning beyond the ranch.
Video: animal breeding and color tiers
For a visual walkthrough, Buckeye Bunny's detailed breeding guide demonstrates the breeding flow, all six color tiers, and examples for the different animal species. It was recorded during Early Access, so use the current requirements and 1.0 notes on this page when a patch-sensitive detail differs.